Hydroponic lettuce is the gateway crop for beginners, and for good reason. It grows fast (5-6 weeks from seed to harvest), thrives in small containers, tolerates beginner mistakes, and produces tender, sweet leaves that put supermarket lettuce to shame. If you grow nothing else hydroponically, grow hydroponic lettuce — it is the most satisfying introduction to soilless growing you can choose.
This complete week-by-week guide walks you through every stage of growing hydroponic lettuce from seed to harvest. By following this timeline, you will know exactly what to expect at each stage, what to do, and what problems to watch for.
🥬 What You Will Achieve
By following this guide, you will harvest a full head of fresh hydroponic lettuce in 35-42 days using approximately 20 minutes of total active time spread across 6 weeks.
What you need before starting
Gather these supplies before beginning your hydroponic lettuce grow. Total cost for first-time growers: approximately £15-25. Subsequent grows cost just £1-3 because you reuse the equipment.
| Item | Purpose | Cost |
|---|---|---|
| 1L wide-mouth jar or container | Holds the nutrient solution | £1-3 |
| 3-inch net pot | Holds the plant above the water | £0.50 |
| Clay pebbles (small bag) | Supports the seedling in the net pot | £3-5 |
| Hydroponic nutrients | Feeds the plant | £8-12 |
| pH test kit + pH Down | Maintains correct water chemistry | £7-10 |
| Lettuce seeds | The starting point | £1-2 |
Best lettuce varieties for hydroponic growing
Not all lettuce varieties perform equally well in hydroponic systems. The best choices for hydroponic lettuce are loose-leaf and butterhead types that grow quickly and stay compact. Avoid large iceberg or romaine varieties that need more space and time.
🌱 Top Hydroponic Lettuce Varieties
- Buttercrunch — sweet, tender, classic butterhead. The easiest beginner choice.
- Tom Thumb — miniature butterhead, perfect for small containers
- Lollo Rosso — loose-leaf with frilly red edges, beautiful and fast
- Salad Bowl — green loose-leaf, very productive, cut and come again
- Oakleaf — distinctive lobed leaves, mild flavour, dependable
Week 1: Germination
Your hydroponic lettuce journey begins not in the jar but on a damp paper towel. Germination happens before transplanting and takes 3-7 days depending on temperature and seed freshness.
What to do
- Dampen a paper towel until it is moist but not dripping
- Fold it in half and place on a small plate
- Place 3-5 lettuce seeds on the surface (do not cover them — lettuce needs light to germinate)
- Cover loosely with cling film to retain moisture
- Place in a warm spot (18-22°C), out of direct sunlight
- Check daily and mist with water if the surface dries
What to expect
Within 3-5 days, you will see tiny pale stems emerging from the seeds, followed by two small rounded leaves (these are called cotyledons or seed leaves). Wait until the seedling develops its first pair of true leaves (the second pair, which look more like miniature lettuce leaves) before transplanting. This typically happens 7-10 days after sowing.
Week 2: Transplant and establishment
Once your hydroponic lettuce seedling has its first true leaves and a small root system visible, it is time to transplant into your prepared jar.
Setting up the jar
- Wrap the jar completely in aluminium foil to block light
- Fill with room-temperature water to 1cm below where the net pot sits
- Add hydroponic nutrients at half strength (half the recommended dosage)
- Stir thoroughly to dissolve
- Test pH and adjust to 5.5-6.5 using pH Down
Transplanting
Fill the net pot one-third full with rinsed clay pebbles. Gently lift your seedling (with the paper towel still attached) and place it in the centre of the net pot. Add more clay pebbles around and over the roots, leaving the stem and leaves exposed above. Place the loaded net pot into the jar opening so it touches the nutrient solution.
💡 Pro Tip
Place the jar in a slightly cooler, less bright spot for the first 24-48 hours after transplanting. This reduces transplant shock and gives roots time to adjust before facing full sun and warmth.
Week 3: Active root development
By week 3, your hydroponic lettuce is establishing its root system. Above-surface growth may seem slow, but below the surface, roots are extending rapidly into the nutrient solution. This is the foundation for the explosive growth that follows.
What to do
- Check the water level — it should still be near the bottom of the net pot
- Test pH and adjust if it has drifted above 6.5
- Look for new leaf growth — you should see 2-4 small new leaves appearing
- Resist the urge to interfere — the plant is doing exactly what it should
What to watch for
Yellow leaves at this stage usually indicate pH problems (most common) or insufficient light. Check pH first. If pH is correct, move the jar to a brighter location or add a clip-on grow light positioned 15-20cm above the plant.
Week 4: Visible growth acceleration
Week 4 is when hydroponic lettuce becomes genuinely impressive. Growth accelerates dramatically. New leaves appear every few days. The plant takes on its mature shape and starts to look like the lettuce you recognise from the supermarket — except larger and more vibrant.
| Stage | What’s Happening | Your Job |
|---|---|---|
| Day 22-24 | Leaf size doubles | Check pH, observe |
| Day 25-28 | Air gap forms below net pot | Do NOT refill water |
⚠️ Critical Warning
Do not refill the water level when it drops. The dropping water level is intentional — it creates an air gap that provides oxygen to the developing roots. Refilling submerges these roots and causes root rot.
Week 5: Approaching harvest
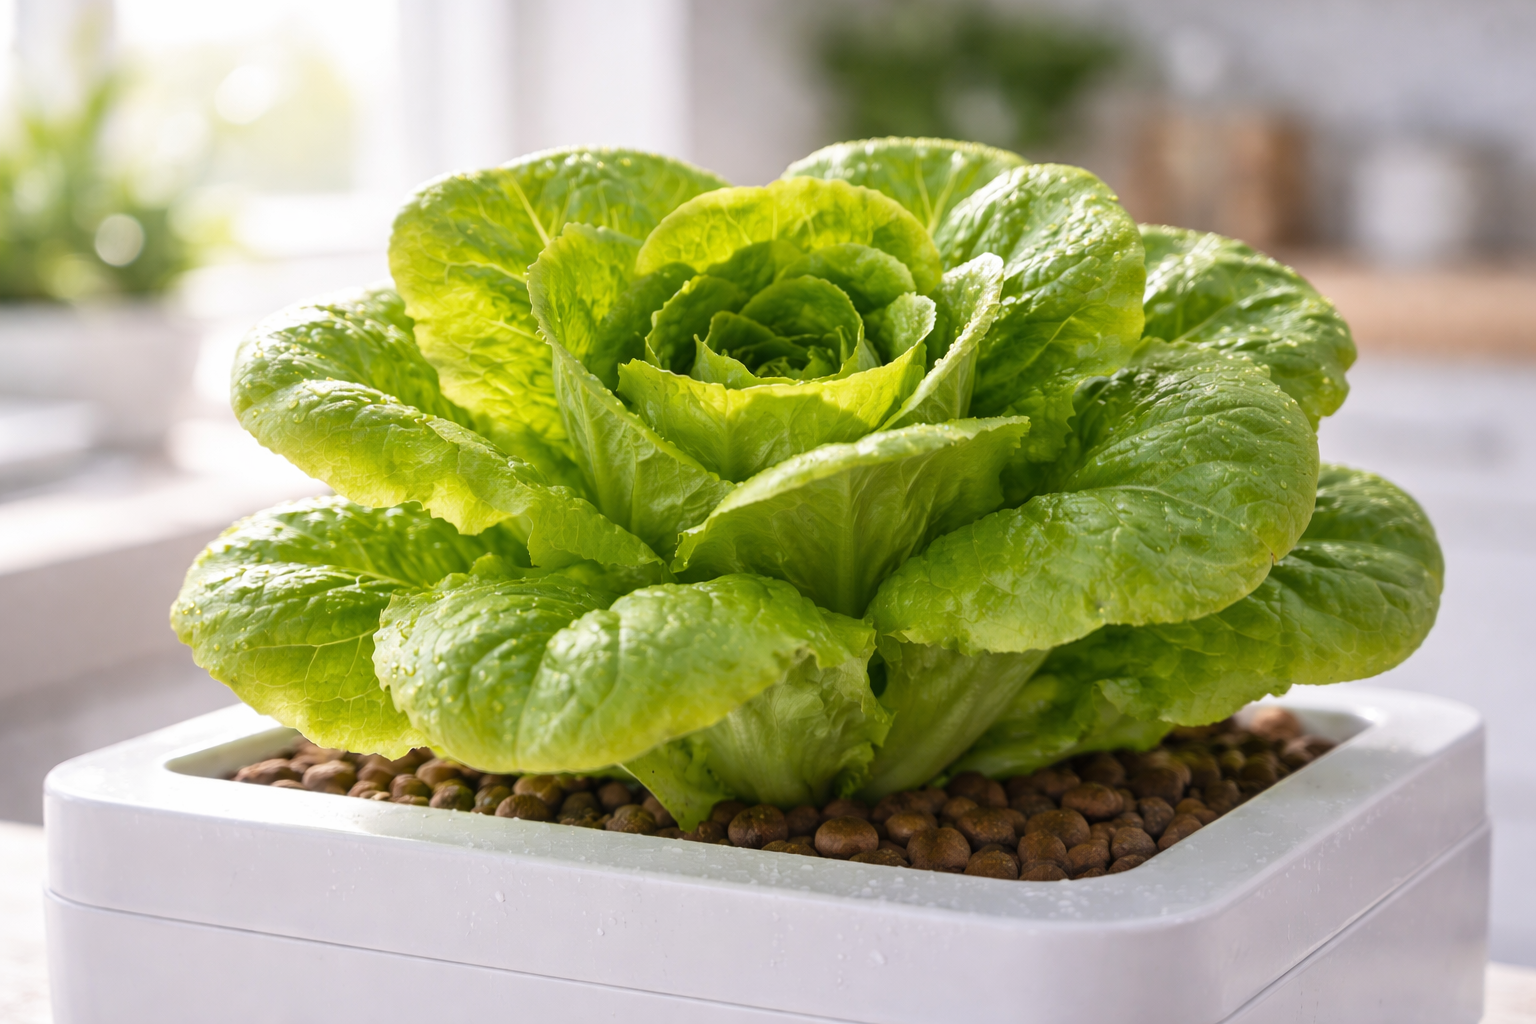
Your hydroponic lettuce is now nearly ready for harvest. The plant has developed a full rosette of leaves. The water level has dropped significantly, leaving a substantial air gap. The roots are visible through the clay pebbles in the net pot.
How to know when to harvest
- The plant has 8-12 fully developed leaves
- The outermost leaves are large enough to use in a salad
- The centre of the plant is dense and well-formed
- The plant has reached its expected size for the variety
Week 6: Harvest and reset
Harvest day is the reward for 5-6 weeks of patient growing. You have two harvesting options for hydroponic lettuce, and the right choice depends on what you want next.
Option 1: Cut and come again
Use scissors to cut the outer leaves from the plant, leaving the central growing point intact. The plant continues producing new leaves for another 2-3 weeks, giving you a continuous supply rather than one large harvest. This method works particularly well with loose-leaf varieties.
Option 2: Whole head harvest
Cut the entire plant at the stem base, just above the net pot. This gives you a complete lettuce head ready for use. Some plants will regrow a smaller second head from the cut stem if you leave it in the system, though this regrowth is typically smaller and less vigorous than the first.
Resetting for the next grow
After harvest, remove the old root mass from the net pot, rinse the clay pebbles, clean the jar, mix fresh nutrient solution, and start a new seedling. You can start the next round of germination during week 5 of your current grow so a new seedling is ready as soon as you harvest, creating a continuous cycle of hydroponic lettuce production.
🔄 The Continuous Harvest Strategy
Run 3 jars staggered 2 weeks apart. When jar 1 is harvested, jar 2 is at week 4, jar 3 is at week 2, and a new seedling is germinating for jar 1’s next grow. This gives you a fresh hydroponic lettuce harvest every 2 weeks indefinitely.
Common hydroponic lettuce problems and quick fixes
Even the easiest crops occasionally have issues. Here are the most common hydroponic lettuce problems and their fixes:
- Yellow leaves: Almost always pH problems. Test and adjust to 5.5-6.5.
- Bitter taste: The plant has bolted (started to flower) due to heat or stress. Harvest immediately and start fresh in a cooler location.
- Slow growth: Insufficient light. Move to a brighter window or add a grow light.
- Wilting despite water: Check roots for root rot (brown and slimy = problem).
- Leggy seedling: Not enough light during germination. Move to a brighter spot or add a grow light.
🌿 Master Every Hydroponic Crop
Our ebook ‘Best Plants for Hydroponics’ includes detailed week-by-week growing guides for 40+ crops, with nutrient schedules, harvest techniques, and crop-specific troubleshooting for each.
Buy your copy at hydrohomegarden.com/ebooks/best-plants/