
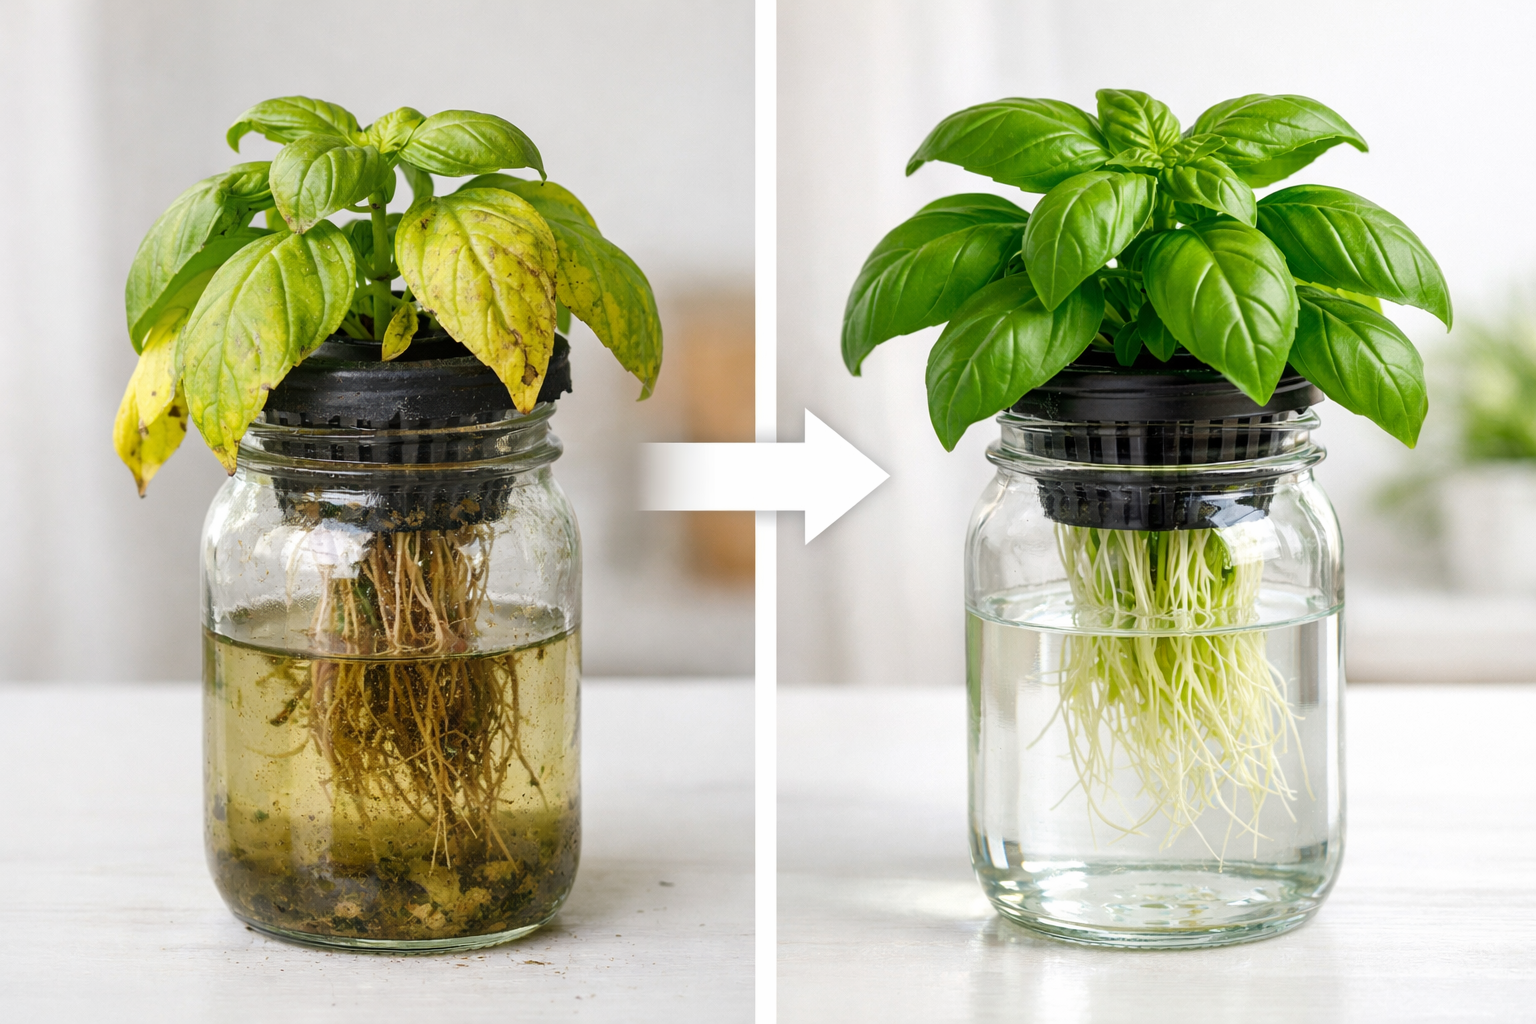
The kratky method is the most forgiving hydroponic system for beginners, but problems can still occur. When your plant looks unhappy — yellow leaves, wilting, stunted growth, or brown roots — you need to identify the cause quickly and fix it before the plant deteriorates further. This kratky method troubleshooting guide covers every common problem with clear symptoms, causes, and solutions.
The good news is that most kratky problems have simple causes and simple fixes. In nearly every case, the issue traces back to one of four things: pH, light, water level, or algae. Fix the right one and your plant recovers within days.
🔍 The 3-Minute Diagnostic
90% of kratky problems come from one of three causes: pH drift (60-70% of issues), insufficient light, or accidentally refilling the container. Check those three first before troubleshooting anything else.
Problem 1: Leaves are turning yellow
Yellow leaves are the most common complaint in kratky method troubleshooting, and they have several possible causes. The key is identifying which type of yellowing you are seeing.
Problem 1aLower leaves turning yellow first (bottom up)
Problem 1bAll leaves yellowing evenly
Problem 1cYellow leaves with green veins
For a complete visual diagnostic of every yellowing pattern across all hydroponic methods, see our hydroponic plants turning yellow guide.
Problem 2: Roots are brown and slimy
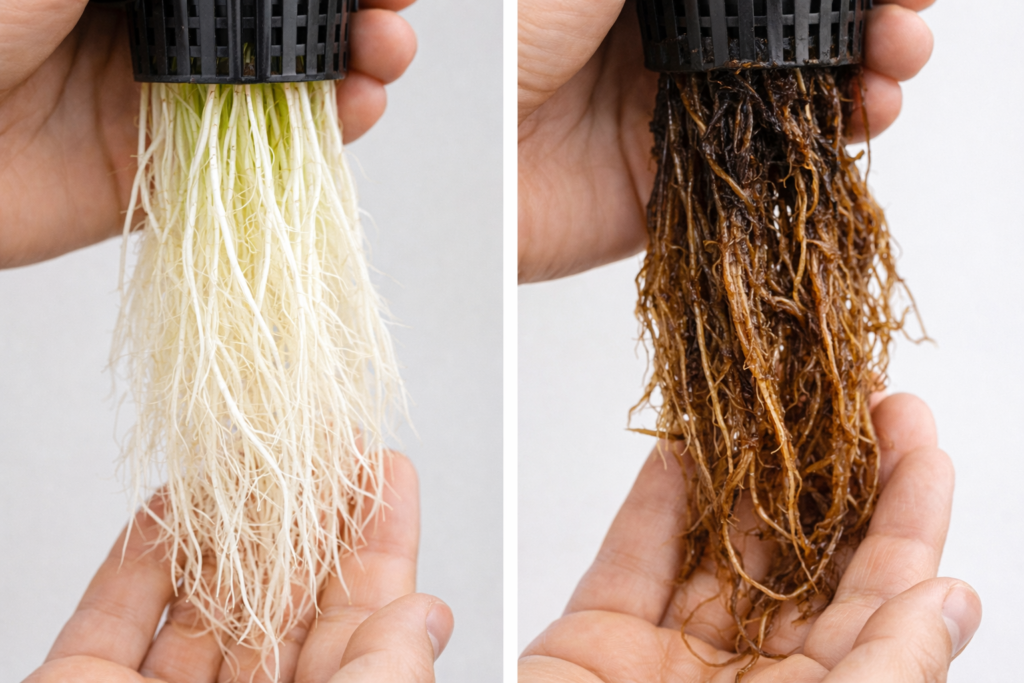
Brown, mushy roots indicate root rot, which is the most serious kratky method troubleshooting issue because it can kill the plant if not addressed quickly.
Problem 2Root rot — the most dangerous kratky issue
The most common trigger is the beginner mistake of refilling the container to the top after the water level has dropped. This submerges the air roots that the plant developed to breathe, suffocating them. Within 24-48 hours, the submerged air roots begin to rot, and the infection can spread to the entire root system.
If the entire root system is brown and mushy with no white roots remaining, the plant is likely beyond saving. Remove it, clean the container thoroughly with a dilute hydrogen peroxide solution (one tablespoon of 3% hydrogen peroxide per litre of water), rinse, and start fresh with a new seedling. The lesson: never refill a kratky container to the top.
For a full guide to root rot across all hydroponic methods, see our hydroponic root rot identify, fix, and prevent guide.
Problem 3: Green algae in the nutrient solution
If your nutrient solution has turned green, or you can see green growth on the inside of the container, around the net pot, or on the clay pebbles, algae has found its way in. This is one of the most frequent kratky method troubleshooting issues and fortunately one of the easiest to prevent and fix.
Problem 3Green algae growth
For the current grow, a small amount of algae is cosmetically unpleasant but usually not harmful to the plant. It competes for nutrients but in a small kratky jar, the plant’s root system vastly outcompetes the algae. Simply block the light source and the algae will stop growing. It does not need to be removed unless it is clogging the net pot or producing a strong smell.
Prevention: Use opaque containers from the start. Wrap thoroughly in foil with no gaps. Cover the top of the net pot with a small piece of foil with a hole cut for the stem. These three steps eliminate algae completely.
For a dedicated guide on algae prevention and removal across all hydroponic systems, see our algae in hydroponic system removal and prevention guide.
Problem 4: Plant is growing very slowly
Slow growth is frustrating but usually has a straightforward cause in kratky method troubleshooting.
Problem 4Stunted or slow growth
Problem 5: Seedling is leggy and thin
Problem 5Stretched, pale, weak seedlings
A leggy seedling has a long, thin, pale stem with widely spaced leaves. It looks stretched and weak rather than compact and sturdy.
Problem 6: Water level dropped very fast
Problem 6Rapid water level drop
For your next grow, use a larger container if the plant consistently exhausts the water supply before harvest. Moving from a 500ml jar to a 1-litre jar, or from 1 litre to 2 litres, provides the extra reservoir capacity that heavy-drinking plants need. See our best plants for kratky method guide for recommended container sizes per crop.
Problem 7: White crusty deposits on pebbles or net pot
Problem 7Mineral salt deposits
Problem 8: Plant is wilting despite water being present
This is alarming but the diagnosis is usually straightforward in kratky method troubleshooting.
Problem 8Wilting with full reservoir
The kratky method troubleshooting checklist
When something goes wrong, work through this checklist in order. The cause is almost always one of the first three items:
| Order | Check | What to Look For |
|---|---|---|
| 1 | pH | Test and adjust to 5.5-6.5 (fixes 60-70% of issues) |
| 2 | Light | Is the plant getting 10+ hours per day? |
| 3 | Water level | Is there an air gap? Have you accidentally refilled to the top? |
| 4 | Temperature | Is the growing area between 18-24°C? |
| 5 | Algae | Is light reaching the nutrient solution? |
| 6 | Roots | Are they white (healthy) or brown and slimy (root rot)? |
Nine times out of ten, the problem is pH, light, or an accidental refill. Fix those three factors and most kratky method troubleshooting issues resolve themselves within a week.
Frequently asked questions about kratky method troubleshooting
How long does it take a kratky plant to recover from a problem?
Most kratky plants recover within 3-7 days once the underlying issue is fixed. pH problems fix fastest (2-3 days to see new green growth). Nutrient deficiencies take 5-7 days. Root rot recovery depends on how much root damage occurred — partial recovery can take 10-14 days, and severely damaged plants may not recover at all.
Should I throw away my plant and start over?
Only if the majority of roots are brown and mushy, or if the plant has been seriously stunted for more than 3 weeks with no improvement after fixing the obvious causes. Most kratky problems are recoverable. Start fresh only when the plant is clearly past saving, and use the experience to improve your next grow.
Why does pH drift in kratky systems?
pH naturally drifts upward over time in kratky systems because plants absorb nutrients (which are often acidic) faster than they absorb water, leaving the remaining solution more alkaline. This is normal and expected. A monthly pH check and small pH Down adjustment is usually enough to keep things stable. For crops taking 60+ days, expect to make 1-2 pH corrections during the grow cycle.
Can I save a kratky plant with leggy stretched growth?
Yes, usually. If caught early (within the first 2 weeks after transplant), increase light intensity and the plant often recovers with stronger stem development. For severely leggy seedlings, re-transplant and bury the elongated stem deeper in the net pot pebbles — the buried stem tissue will grow supplementary roots in many crops, creating a more stable plant.
Is it normal for some lower leaves to yellow as the plant matures?
Yes, a small amount of lower leaf yellowing near harvest is completely normal. The plant redirects nutrients from older leaves to newer growth as the nutrient solution runs low. This is different from widespread yellowing across all leaves (which indicates pH or nutrient problems) or yellowing on young leaves (which is more serious).
Why does my water smell bad even though the plant looks fine?
A bad smell usually indicates bacterial activity in the water, often because the solution is too warm or has been contaminated by dirty equipment. If the plant still looks healthy, you can often continue the grow — just make sure the container is light-tight, move it to a cooler location, and harvest as soon as ready. For next time, sterilise equipment with hot water before use and avoid placing containers in warm spots.
Related posts you might find useful
- Kratky Method Hydroponics: Complete Guide — The core theory and science
- Kratky Jar Setup in Under 10 Minutes — Step-by-step jar assembly
- Kratky vs DWC: Which Passive System Is Better? — Consider upgrading to DWC
- Best Plants for Kratky Method Ranked — Match crop to container size
- Hydroponic Plants Turning Yellow Every Cause Explained — Deeper dive on yellowing
- Hydroponic Root Rot: Identify, Fix, and Prevent — Detailed root rot guide
- Algae in Hydroponic System Complete Removal Guide — Detailed algae guide
Master the Kratky Method
Our 22-page ebook The Kratky Method: Hydroponics Without Electricity covers single jars, multi-plant tubs, nutrient schedules, a complete week-by-week calendar, troubleshooting, and advanced techniques.
✓ Week-by-week calendar · ✓ Multi-plant tub designs · ✓ Troubleshooting flowcharts · ✓ Instant PDF download