
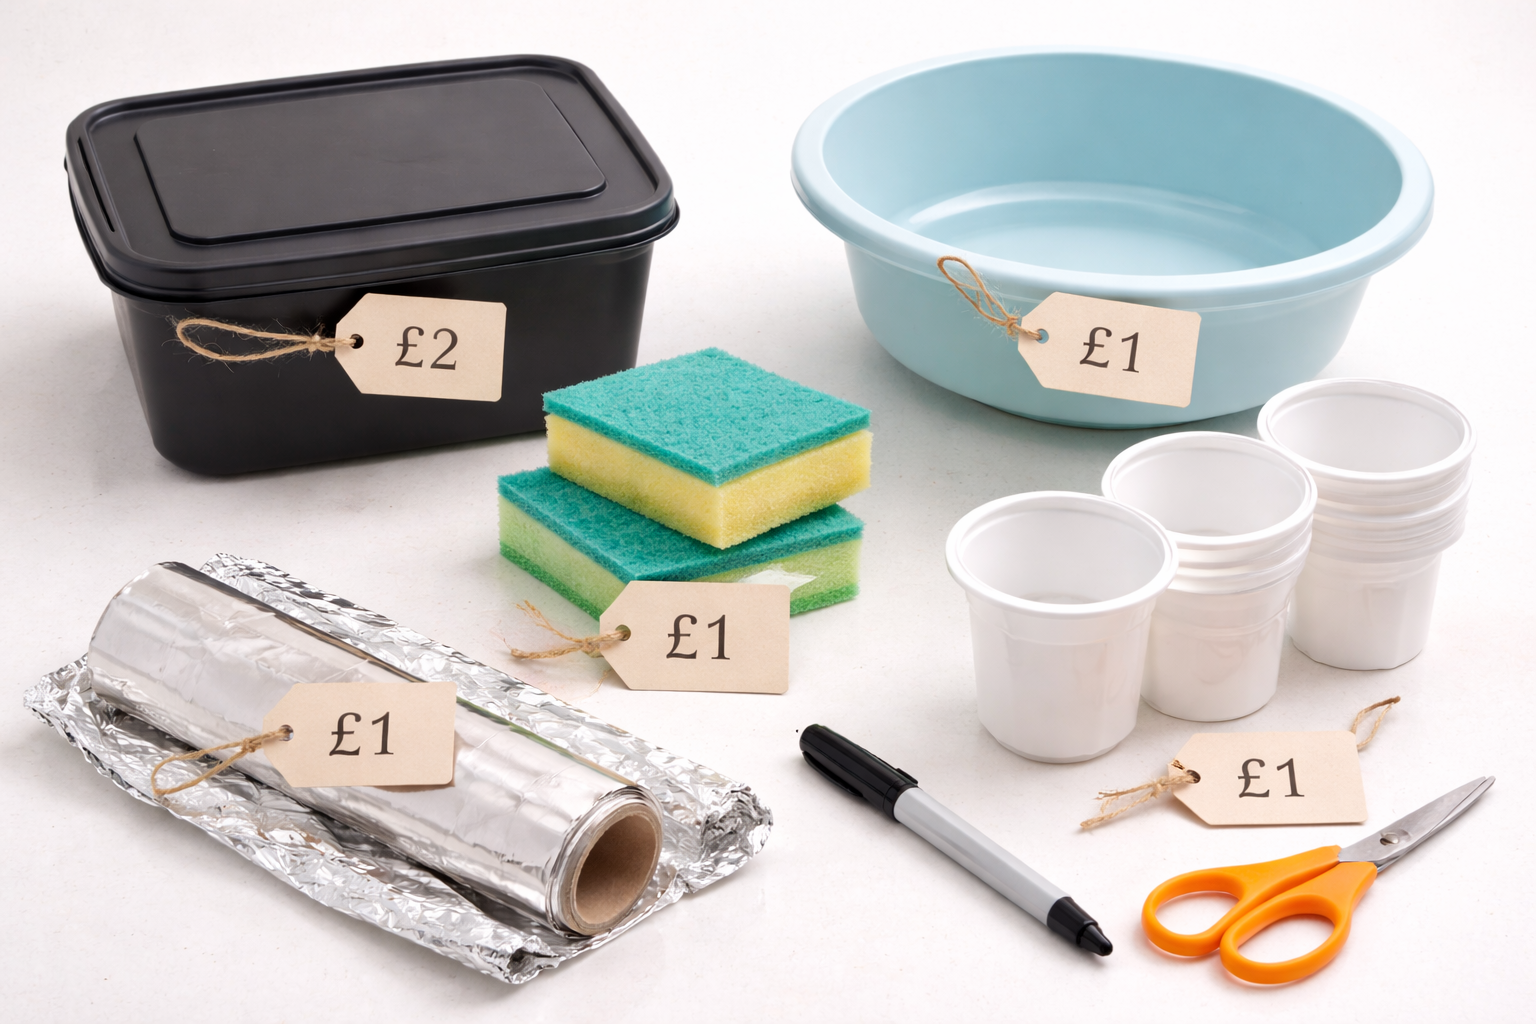
You do not need to visit a specialist hydroponics shop to start growing food without soil. Everything you need for budget hydroponic systems can be found at your local pound shop, Poundland, Wilko, or Home Bargains. These five builds use everyday household items to create systems that genuinely grow fresh herbs and vegetables.
Each build costs under £10 in materials, excluding nutrients and pH testing supplies which you buy once and use across all systems for months. I have listed the exact items to look for, where to find them, and step-by-step assembly instructions for each system.
The goal is to prove that hydroponics is not an expensive hobby. It is accessible to anyone with a few pounds and a windowsill.
💷 What You’ll Build
5 working hydroponic systems for £3-£8 each, using items from Poundland, Wilko, Home Bargains, and your recycling bin. Each system grows real food — lettuce, herbs, or microgreens — in 3-6 weeks.
Before you start: the two items you cannot find at the pound shop
All five systems need hydroponic nutrient solution and pH management. These are the two items you will need to order from Amazon UK or pick up at a garden centre:
🛒 The Non-Pound-Shop Essentials
- Hydroponic nutrients (£8-12): Formulex (UK brand) or General Hydroponics Flora Series. One bottle lasts 6-12 months across all your systems. This is the food your plants live on.
- pH test drops and pH Down (£7-10 total): Also lasting 6-12 months. These ensure your plants can absorb the nutrients you provide.
Think of these as the flour and sugar of hydroponics — the base ingredients you always have in stock. Once purchased, they support every system you build for months. See our nutrients for beginners guide for the complete rundown.
The 5 pound shop hydroponic systems ranked
#1The Food Container Kratky (£3) — Cheapest & Simplest
The absolute simplest hydroponic system. One container, one plant, zero moving parts, zero electricity, zero maintenance beyond a weekly glance.
Shopping list
| Item | Source | Cost |
|---|---|---|
| Opaque food storage container (1-2L) with snap-on lid | Poundland or Wilko | £1 |
| Kitchen sponge (cut 3cm cube for seedling) | Poundland multipack | £1 |
| Aluminium foil (only if container is transparent) | Any supermarket | £1 |
Assembly
Cut a hole in the centre of the lid, slightly smaller than your sponge cube so it fits snugly without falling through. If you have net pots from Amazon UK (approximately 50p each in bulk packs), use those instead of a sponge for a cleaner fit.
If the container is transparent or translucent, wrap it completely in aluminium foil to block light. Any light reaching the nutrient solution causes algae, which competes with your plant for nutrients.
Fill the container with nutrient solution mixed at half strength, leaving approximately 1 centimetre of space below the lid. Place a pre-germinated seedling (lettuce, basil, or any small herb) into the sponge cube. Set the sponge into the lid hole so it touches the nutrient solution below. Snap the lid on.
Place on a sunny windowsill and leave it alone. Check the water level once a week. As the plant drinks, the water drops and an air gap forms — this is intentional and provides oxygen to the roots. Do not refill to the original level. That is genuinely the entire process.
Best for: Absolute beginners who want to prove to themselves that hydroponics works before investing any significant money. This £3 system grows lettuce in 30-45 days and herbs in 21-35 days.
#2The Yoghurt Pot Herb Garden (£4) — Most Variety
A collection of individual small containers, each growing one herb, grouped together on a tray for a mini kitchen garden effect.
Shopping list
| Item | Source | Cost |
|---|---|---|
| 4-6 empty yoghurt pots (500ml) | Your recycling bin | Free |
| Plastic serving tray or baking tray | Poundland | £1 |
| Kitchen sponges | Poundland multipack | £1 |
| Aluminium foil | Any supermarket | £1 |
| Cling film | Any supermarket | £1 |
Assembly
Wrap each yoghurt pot completely in aluminium foil. Cut a hole in the base of each pot (approximately 1cm diameter) and thread a small piece of sponge or cotton wool through as a wick. This draws water upward from the tray below.
Place all pots on the tray. Pour nutrient solution into the tray to a depth of about 2 centimetres. The wicks will draw the solution up into each pot. Place a sponge cube with a seedling in the top of each pot. Cover the tops loosely with cling film until seeds germinate to retain moisture and warmth.
Each pot grows one herb plant. With six pots you can have basil, mint, coriander, parsley, chives, and lettuce all growing simultaneously in a space no larger than an A4 sheet of paper. Top up the tray with nutrient solution every 3-5 days as it is absorbed.
Best for: People who want variety from day one. The individual pots let you grow 4-6 different herbs using materials that would otherwise go in the recycling bin. Total growing area: one small kitchen tray.
#3The Storage Tub Multi-Plant Kratky (£5-6) — Best Value per Plant
A single larger container growing 4-6 plants simultaneously from one shared reservoir. This is the most productive budget hydroponic system per pound spent.
Shopping list
| Item | Source | Cost |
|---|---|---|
| Dark-coloured storage box (10-20L) with clip-on lid | Wilko, Home Bargains, Poundland | £3-4 |
| Kitchen sponges | Poundland multipack | £1 |
| Marker pen | Poundland | £1 |
Assembly
Mark 4-6 evenly spaced circles on the lid, each approximately 5 centimetres in diameter. Space them at least 10 centimetres apart so the plants have room to grow without crowding each other. Cut the holes carefully using a sharp knife or scissors.
Fill the tub with nutrient solution mixed at the appropriate strength for your crops (half strength for seedlings, full strength for established plants). Insert sponge cubes or net pots with seedlings into each hole. Snap the lid onto the tub firmly.
This is a multi-plant Kratky system. All plants share the same reservoir, which has two important implications. First, the larger water volume means pH and temperature are more stable than in individual jars, which is an advantage. Second, all plants receive the same nutrient concentration, so you should group plants with similar needs. Grow all lettuce, all herbs, or all leafy greens in one tub. Do not mix leafy greens (which need low EC) with fruiting crops (which need high EC). See our nutrient schedule guide for EC targets.
A 20-litre tub growing 6 lettuce plants produces enough salad greens for a family of four, harvesting 1-2 heads per week on a staggered cycle.
Best for: Growers who want maximum production from a single container. The shared reservoir means less maintenance (one pH check covers all plants) and the dark storage box blocks light without needing foil. This is arguably the best value budget hydroponic system available.
#4The Washing-Up Bowl DWC (£7-8) — Fastest Growth
A step up from passive Kratky: this system adds an air pump for faster, more vigorous growth. It is still extremely budget-friendly and grows noticeably faster than passive systems.
Shopping list
| Item | Source | Cost |
|---|---|---|
| Large opaque washing-up bowl | Poundland or Wilko | £1-2 |
| Small aquarium air pump | Amazon UK or pet shop | £5 |
| Air stone (smallest available) | Same as above | £1-2 |
| Thick cardboard, chopping board, or polystyrene | From packaging (free) or Poundland | Free – £1 |
Assembly
Place the air stone in the bottom of the bowl, connected to the air pump via the included airline tubing. Fill the bowl with nutrient solution to approximately 3 centimetres below the rim.
Create a lid from your chosen material. Thick cardboard works for short-term use (it will eventually absorb moisture, so cover it in cling film or foil to extend its life). A piece of polystyrene packaging is better — it is waterproof, lightweight, and floats if it drops into the water. A plastic chopping board cut to size is the most durable option.
Cut 2-3 holes in the lid for sponge cubes or net pots. Insert seedlings, place the lid on the bowl, and turn on the air pump. The continuous bubbling oxygenates the solution, promoting faster root development and more vigorous growth compared to passive Kratky systems.
Position near a window or under a grow light. The air pump runs 24/7 but uses less electricity than a phone charger. Place it on a folded towel to minimise vibration noise.
Best for: Growers who want faster results than Kratky provides but are not ready to invest in a full bucket system. The washing-up bowl is wide and shallow, which makes it excellent for growing a cluster of lettuce heads that need horizontal space rather than deep roots.
#5The Vertical Bottle Tower (£5) — Most Impressive Visual
The most visually impressive budget hydroponic system. A vertical stack of recycled bottles grows 4-8 plants in the footprint of a single bottle. This is perfect for growers with very limited horizontal space but a wall, railing, or hook to hang from.
Shopping list
| Item | Source | Cost |
|---|---|---|
| 4 large plastic bottles (2L) | Your recycling bin | Free |
| String or garden wire | Poundland | £1 |
| Nail, scissors, or screwdriver | You own these already | Free |
| Aluminium foil | Any supermarket | £1 |
| Cotton wool or small sponge pieces | Poundland | £1 |
| Hook, nail, or plant hanger | Wilko, B&Q, or Poundland | £1-2 |
Assembly
Cut each bottle in half horizontally. In the bottom half of each bottle, cut a planting hole approximately 5 centimetres wide in the side, about 3 centimetres from the cut edge. This is where the plant will emerge.
Poke 2-3 small drainage holes in the bottom of each bottle half. Thread strong string or garden wire through these holes to connect the bottles vertically, with each bottle half sitting above the next like a chain. Space them about 15-20 centimetres apart on the string.
Wrap each bottle half in aluminium foil. Fill each one with a growing medium: cotton wool, perlite, coconut coir, or even shredded newspaper work. Plant one seedling per bottle through each side hole.
Hang the tower near a bright window, from a balcony railing, or on a wall hook. When you water (by pouring nutrient solution into the top bottle), it trickles down through each bottle in the chain, watering each plant on its way down. Excess drains from the bottom into a catch tray.
This system works best with lightweight crops: herbs, small lettuce varieties, strawberry plants, and microgreens. Avoid heavy fruiting crops that would weigh down the tower. See our vertical hydroponic tower guide for more elaborate vertical builds.
Best for: Apartment growers with limited counter or windowsill space who have a wall, window frame, or balcony railing available for hanging. The tower grows 4-8 plants in a vertical strip approximately 15 centimetres wide. It is also an excellent conversation piece and science project.
Which system should you build first?
🎯 Quick Recommendation Guide
| Never grown before | #1 Food Container Kratky (£3) |
| Maximum food per pound | #3 Storage Tub (£5-6) |
| Fastest growth | #4 Washing-Up Bowl DWC (£7-8) |
| Variety from day one | #2 Yoghurt Pot Garden (£4) |
| Minimal space / most visual | #5 Vertical Bottle Tower (£5) |
All five systems teach the same fundamental skills: nutrient mixing, pH management, light provision, and plant observation. Master any one of them and you can confidently tackle any hydroponic method in the future.
Frequently asked questions about pound shop hydroponics
Do pound shop materials really last as long as “proper” hydroponic equipment?
For the plastic components, yes — a £1 storage tub lasts just as long as a £20 hydroponic reservoir (they’re often made from identical HDPE plastic). The compromise is aesthetics and pre-made integration, not durability. A well-chosen pound shop build lasts for years of continuous use.
Can I combine pound shop systems with commercial nutrients and seeds?
Absolutely — and you should. The container is the cheap part. The nutrients need to be proper hydroponic nutrients (not regular plant food) because they contain the specific mineral balance hydroponic plants need. Combining a £3 container with £10 of proper nutrients is the winning combination.
Is Poundland still called Poundland if items cost more than £1 now?
Yes — Poundland has expanded its price range significantly since the pandemic, with many items now £1-5. Home Bargains and B&M have become better options for true £1 items. Wilko (in areas where it still operates) and The Works are also excellent hunting grounds for sub-£5 hydroponic components.
Will pound shop containers leach chemicals into my plants?
No, not if you choose food-grade plastic containers (most storage boxes and food containers are). Avoid containers explicitly labelled “not food safe” or unusual coloured plastics. Clear, white, and natural HDPE plastics are all safe for hydroponic growing with leafy greens and herbs.
Can I use pound shop nutrient mixes instead of proper hydroponic nutrients?
No. This is the one place you cannot save money. Regular plant food and garden fertilisers lack the specific calcium, magnesium, and trace element balance hydroponic plants need. A £10 bottle of Formulex produces dramatically better results than a £2 bottle of general plant food — this is the one item worth splurging on.
What’s the absolute cheapest working hydroponic setup I can build?
A recycled 2-litre plastic bottle + kitchen sponge + foil = total cost for container is literally zero. Combined with shared nutrients, you can start hydroponics for the £15-17 cost of nutrients and pH supplies alone. See our plastic bottle hydroponics guide for that build.
How do I upgrade when I outgrow pound shop systems?
You scale up, not replace. Build more pound shop systems (they’re cheap) until you need a dedicated setup. Then move to a DWC bucket system (still under £30) or a vertical tower. The skills transfer entirely. See our £30 hydroponic system guide for the natural upgrade path.
Do pound shop builds work for apartment growers?
Exceptionally well. Systems #1, #2, and #5 are specifically designed for apartment spaces. All five fit on a windowsill or in a small corner. See our apartment hydroponics guide for more space-efficient approaches.
Related posts you might find useful
- How to Start Hydroponics with Mason Jars — Similar simplicity, uses mason jars instead
- DIY Hydroponics with Plastic Bottles — Zero-cost alternative using recycling
- The £30 Hydroponic System That Actually Works — Next-step DWC build
- Hydroponic Cost Breakdown — Full cost analysis across all tiers
- Kratky Method Hydroponics — The science behind systems #1, #2, #3, #5
- Apartment Hydroponics Complete Guide — Space-efficient builds
- 10 Easy Hydroponic Plants — Best first crops for budget systems
Build Your First System on a Budget
Our 22-page ebook Build Your First Hydroponic System on a Budget has step-by-step build plans with photos for 5 systems from £10 to £50, plus troubleshooting and crop recommendations for each.
✓ 5 detailed builds with photos · ✓ UK shopping lists · ✓ Cost-saving strategies · ✓ Instant PDF download