
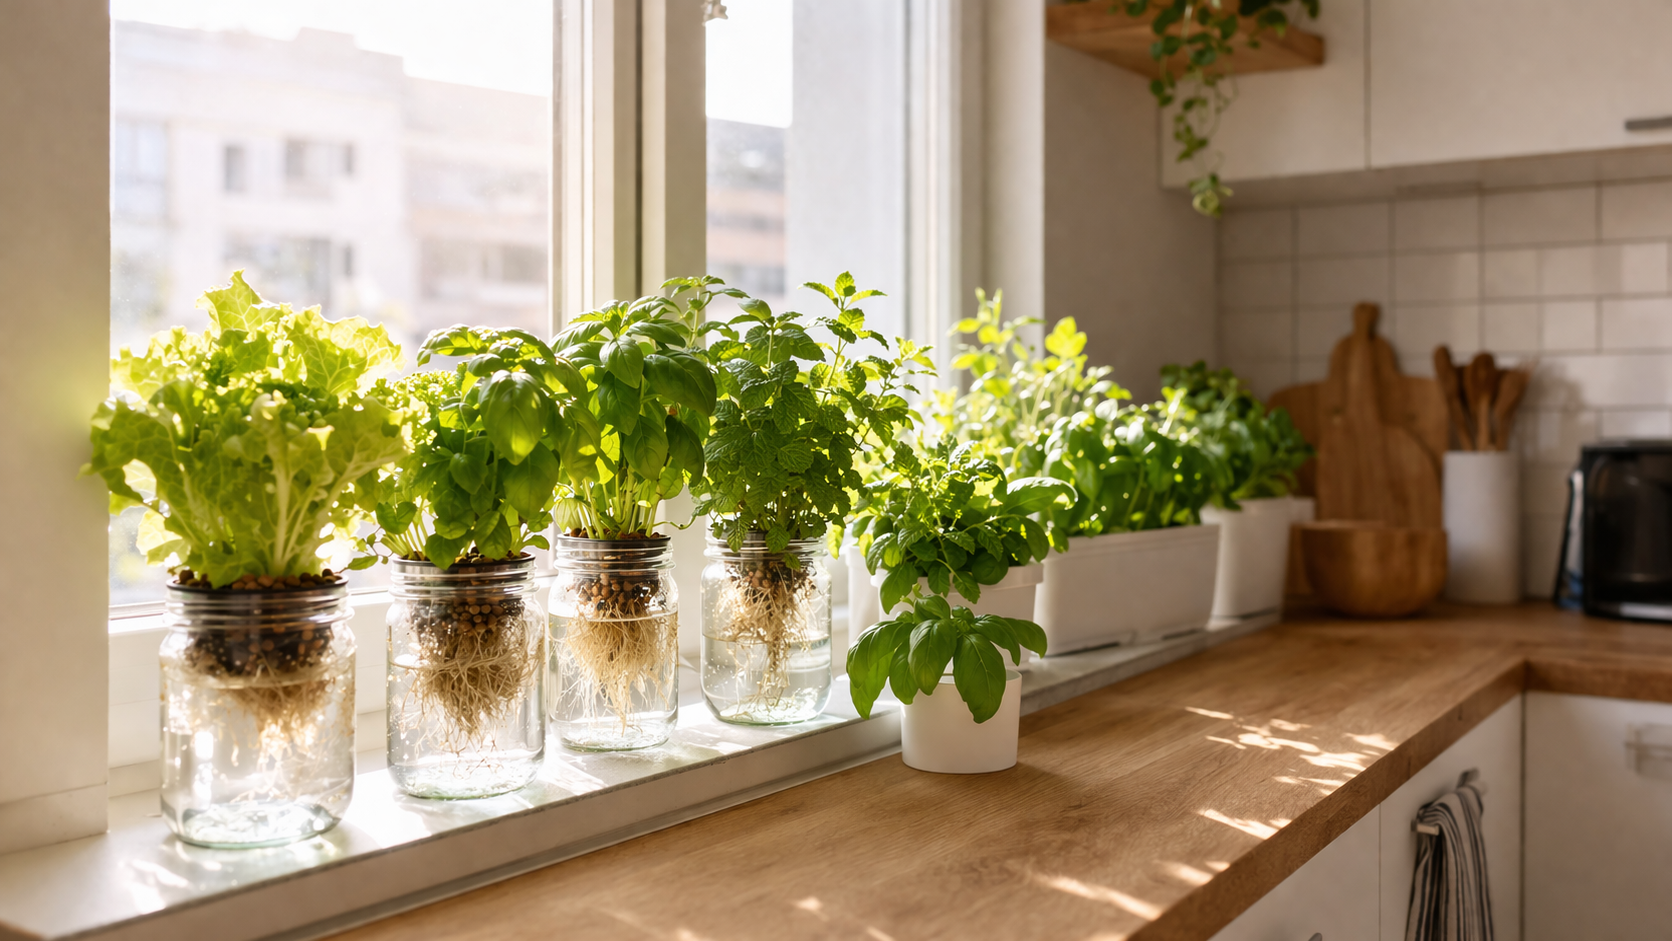
Apartment hydroponics is the perfect solution for anyone who wants to grow fresh food but lacks outdoor space, a garden, or even a balcony. Whether you live in a tiny studio flat in central London or a one-bedroom apartment in Manchester, you can produce fresh herbs, salad greens, and even fruiting plants using less than 2 square feet of counter or windowsill space. The best part is that apartment hydroponics requires no soil, minimal equipment, and works in spaces that traditional gardening simply cannot reach.
This guide covers seven proven methods for apartment hydroponics, ranked by ease and space efficiency. Each method has been tested in real apartments and works with standard household conditions — no special rooms, expensive equipment, or technical expertise required.
🏙️ The Apartment Advantage
Apartment hydroponics actually beats traditional gardening in several ways: faster growth (30-50% faster than soil), no pests, year-round harvests, no weeding, and complete control over your growing conditions. Small spaces are an advantage, not a limitation.
Why does apartment hydroponics work better than soil gardening?
Apartments present unique challenges for traditional gardening: limited space, no garden access, indoor light limitations, and the practical issue of soil mess inside a living space. Apartment hydroponics solves all of these problems simultaneously. Plants grow in nutrient-enriched water rather than soil, eliminating dirt, weeds, and most pests. According to research from the Royal Horticultural Society, hydroponic systems use up to 90% less water than soil-based growing while producing crops 30-50% faster.
The compact nature of hydroponic systems means you can fit a productive food garden into spaces as small as a single windowsill, a corner of a kitchen counter, or even a vertical strip of wall. There is no minimum space requirement for apartment hydroponics — only a minimum light requirement, which can be solved with affordable LED grow lights if natural light is limited.
What is the best apartment hydroponics method for beginners?
The seven methods below are ranked from easiest to most advanced. Beginners should start with method 1 (Kratky jars) before working up the list as their confidence and interest grows.
#1Kratky mason jars — The easiest start
The Kratky method is the gold standard for apartment hydroponics beginners. A single mason jar with a net pot and a pre-germinated seedling produces fresh lettuce or herbs with zero electricity, no pump noise, and minimal weekly maintenance. A typical setup costs £15-20 and takes up the footprint of a coffee mug.
| Specification | Details |
|---|---|
| Space needed | 8cm x 8cm per jar |
| Cost | £15-20 per jar |
| Best for | Lettuce, basil, mint, herbs |
| Maintenance | 2 minutes per week |
Our kratky jar setup guide walks through the exact 10-minute assembly process.
#2Countertop smart gardens — Zero effort
Pre-built systems like the Click and Grow Smart Garden or LetPot are designed specifically for apartment hydroponics. They include integrated LED lights, automatic watering, and pre-seeded plant pods. You plug them in, add water, and harvest fresh herbs in 3-4 weeks. These cost £60-150 but require almost no learning curve.
#3Window-mounted herb gardens — Vertical space
Small suction-cup planters or window-mounted shelves let you create vertical apartment hydroponics gardens that use no counter space at all. Several small jars hang from a window-mounted frame, taking advantage of the natural light from the window itself. Perfect for tiny studios where every inch of counter space is precious.
#4Stacked tower systems — Maximum vertical efficiency
Vertical tower systems like the Lettuce Grow Farmstand or DIY PVC towers grow 20-32 plants in a footprint smaller than 1 square metre. These are the most productive form of apartment hydroponics per square foot of floor space, though they require more upfront investment (£100-300). For the complete DIY approach, see our DIY vertical hydroponic tower guide.
#5Under-cabinet shelving units
Wire shelving units (£25-50 from Argos or Amazon UK) topped with full-spectrum LED grow lights (£15-30 each) create dedicated apartment hydroponics growing stations. A 3-shelf unit can hold 12-18 plants and tucks neatly into corners or alongside furniture.
#6Hanging vertical pocket gardens
Felt pocket planters designed for vertical gardening can be adapted for apartment hydroponics by lining them with plastic and using passive wicking systems. These mount on walls and turn unused vertical space into productive growing areas. Great for renters since they come down without damage.
#7Closet grow tents — For serious growers
Small grow tents (60cm x 60cm) fit inside a wardrobe or unused closet and create a complete controlled growing environment. This is the most advanced apartment hydroponics method but enables year-round production of demanding crops like tomatoes and peppers.
What plants grow best in apartment hydroponics?
Not every plant is suited to apartment hydroponics. Choose crops based on three factors: light requirements, container size needs, and how quickly they mature. The best beginner choices are fast-growing leafy greens and herbs that thrive on windowsill light.
🌱 Top 8 Apartment Hydroponics Crops
- Butter lettuce — Ready in 30-45 days, fits any windowsill
- Basil — Continuous harvests for months from one plant
- Mint — Virtually impossible to kill, tolerates low light
- Spinach — Cool-loving, perfect for winter apartment growing
- Microgreens — Fastest crop, ready in 7-14 days
- Coriander — Quick herb for Asian and Mexican cooking
- Pak choi — Crisp Asian green, 30-45 days
- Strawberries — Possible with grow lights, year-round fruit
For the complete ranked list with success rates, see our 10 easy hydroponic plants almost impossible to kill.
How much light does apartment hydroponics actually need?
Light is the single biggest challenge in apartment hydroponics because most apartments have limited natural light. The good news is that even modest light works for the easiest crops, and supplemental LED grow lights are inexpensive and effective.
| Crop Type | Daily Light Needs | Solution |
|---|---|---|
| Microgreens | 4-6 hours | Any window works |
| Lettuce, mint | 8-10 hours | East/west window or LED |
| Basil, spinach | 12-14 hours | South window or LED |
| Tomatoes, strawberries | 14-16 hours | Powerful LED required |
💡 The £15 Light Hack
A clip-on LED grow light (£10-15 from Amazon UK) attached to a desk lamp or shelf transforms any low-light corner into a productive apartment hydroponics growing area. Set a basic plug-in timer (£5) for 14 hours on and 10 hours off and you have a fully automated lighting system.
Intermediate level: how to maximise apartment hydroponics yields
Once you have mastered basic apartment hydroponics with one or two jars, several techniques dramatically increase your output without taking more space.
Staggered planting for continuous harvests
Instead of planting all your jars at once, start a new jar every 5-7 days. After 5-6 weeks, you have plants at every growth stage. When you harvest one, start a new one immediately. This creates a permanent rotation rather than a single big harvest followed by empty containers.
Vertical thinking for space efficiency
Apartments are usually limited horizontally but rich vertically. Wall-mounted shelves, hanging baskets, window-mounted frames, and stacked containers all use space that would otherwise be wasted. A 1-metre vertical strip can hold 4-6 jars while occupying virtually no floor space.
Companion crop scheduling
Combine fast-growing crops (microgreens, cress) with slower ones (basil, lettuce) so you have something ready to harvest every week, not just every month. The fast crops fill in the gaps between major harvests. Our microgreens hydroponics guide shows how to add a continuous microgreens rotation.
What next? Scaling your apartment hydroponics
After mastering the basics, here are natural next steps for serious apartment hydroponics growers:
- Add a small DWC bucket for faster growth and larger plants — see our kratky vs DWC comparison for when to upgrade
- Build a dedicated grow shelf with LED lighting on a timer
- Try fruiting crops like cherry tomatoes once you have reliable lighting
- Experiment with vertical towers for maximum production per square foot
- Start a kitchen herb garden with our 30-minute kitchen herb garden setup guide
- Move to a balcony setup if you have one — see our balcony hydroponics complete guide
Frequently asked questions about apartment hydroponics
How much does apartment hydroponics cost to start?
A complete apartment hydroponics setup costs £15-25 for your first Kratky jar including all supplies. This includes the jar, net pot, clay pebbles, nutrients, pH test kit, and seeds. Subsequent jars cost just £1-3 each because you reuse most of the supplies. Pre-built smart gardens cost £60-150 but require no learning.
Will apartment hydroponics make my home smell?
No. Properly maintained apartment hydroponics systems produce no noticeable odour. The only smell associated with hydroponics is from the herbs themselves, which is generally pleasant. Bad smells indicate root rot or stagnant water — both fixable problems but rare in well-managed systems. See our hydroponic root rot guide if you notice musty smells.
Can I do apartment hydroponics without a window?
Yes, but you need an LED grow light. Crops like lettuce, herbs, and microgreens grow excellently under a £15-25 LED grow light positioned 15-20cm above the plants on a 14-hour timer. Windowless apartment hydroponics is completely viable with this setup.
Is apartment hydroponics noisy?
Kratky systems are completely silent. DWC systems with air pumps produce a quiet hum (similar to an aquarium pump) that most people stop noticing within a day. If noise is a concern, stick with Kratky jars for absolutely silent growing.
Can renters do apartment hydroponics?
Absolutely. Apartment hydroponics requires no permanent installation, no holes in walls, and no modifications to the property. Everything sits on existing surfaces or uses removable adhesive hooks. When you move, the entire setup packs up in a single box.
How much food can a small apartment hydroponics setup actually produce?
A well-managed setup of 6 jars on a windowsill produces enough fresh herbs and salad greens to noticeably reduce supermarket purchases. Expect approximately 1-2 lettuce heads per week plus continuous herb harvests. This is enough for one or two people to eat fresh greens regularly.
What’s the difference between a balcony and windowsill setup?
Balcony setups give you more space and direct sunlight but require wind-resistant containers and protection from temperature swings. Windowsill setups are simpler and fully climate-controlled but limited in scale. Most UK apartments do best with windowsill-only growing in winter and a mix of windowsill plus balcony in summer.
Related posts you might find useful
- Kitchen Herb Garden in 30 Minutes — Apartment-friendly herb-specific setup
- Balcony Hydroponics Complete Guide — If you have outdoor space available
- DIY Vertical Hydroponic Tower — Maximum production in small footprints
- Best Hydroponic Systems for Small Apartments — Buying guide for apartment growers
- Kratky Method Hydroponics: Complete Guide — The simplest apartment-friendly method
- What Is Hydroponics? Plain English Explanation — Start here if new to soilless growing
- 10 Easy Hydroponic Plants Almost Impossible to Kill — Best crops for apartment growing
Master Apartment Hydroponics
Our 16-page ebook Apartment Hydroponics covers complete setups for studio flats, one-bedroom apartments, and even windowless spaces, with system designs for every budget and space constraint.
✓ Studio flat setups · ✓ Windowless grow designs · ✓ Renter-friendly options · ✓ Instant PDF download