
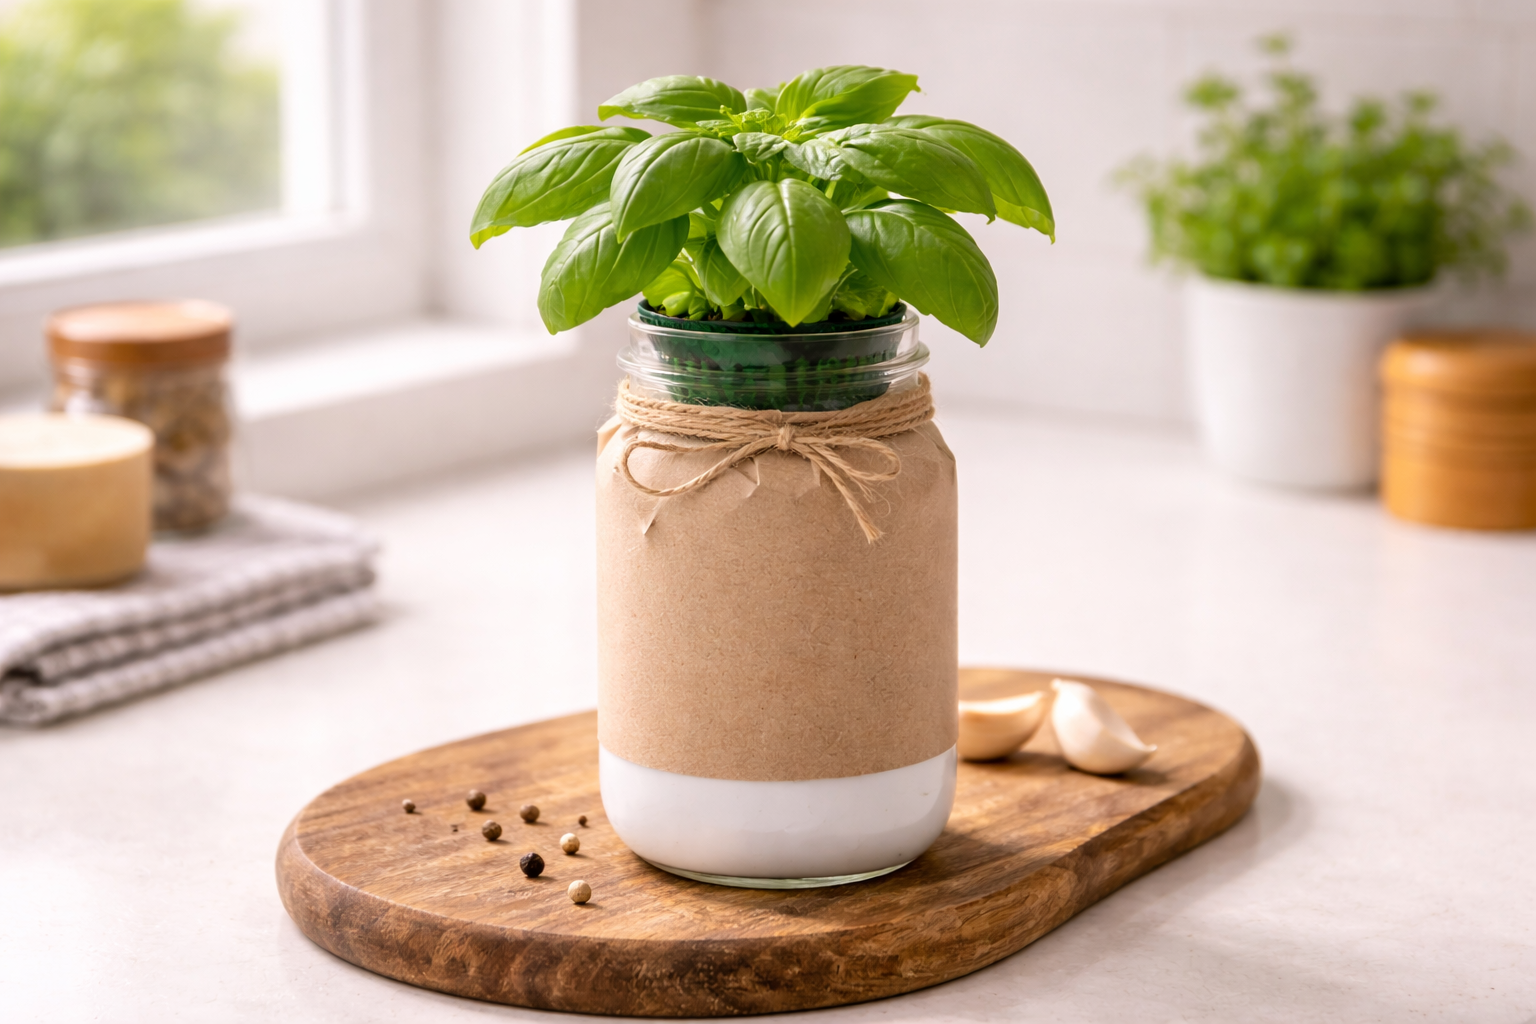
If you want the absolute simplest entry point into hydroponics, mason jar hydroponics using the Kratky method is it. One jar, one net pot, some clay pebbles, nutrient solution, and a seedling. No pump. No timer. No electricity. No daily maintenance. Just a jar on a windowsill growing fresh food while you go about your life.
The Kratky method was developed by Professor B.A. Kratky at the University of Hawaii specifically to make hydroponic growing accessible to everyone, regardless of budget, experience, or access to electricity. His method requires nothing beyond a container and nutrients. It is passive, completely silent, and nearly foolproof when you follow a few simple rules.
This guide walks you through every step from empty jar to harvest-ready plant, with exact measurements and timings so you can reproduce the results on your first try.
🌱 What You’ll Achieve
By following this guide, you’ll harvest your first lettuce or basil in 5-6 weeks for under £20, using about 30 minutes of total active time. No electricity, no noise, no daily maintenance.
What you need to get started
🛒 Complete Shopping List
| Wide-mouth mason jar (500ml-1L) Amazon UK, Wilko, Home Bargains, or recycled jam jar |
£2-3 |
| 3-inch net pot Amazon UK 10-pack |
£0.50 |
| Clay pebbles (LECA) Amazon UK or garden centre |
£3-5 |
| Hydroponic nutrients Formulex (UK brand) or General Hydroponics Flora Series |
£8-12 |
| pH test drops General Hydroponics kit, lasts 200+ tests |
£4-6 |
| pH Down solution Lasts 6-12 months |
£3-5 |
| Aluminium foil Tesco, Sainsbury’s — you likely already have this |
£1 |
| Seeds Suttons, Thompson & Morgan, or any UK supermarket |
£1-2 |
| Total Cost (First Jar) | £22-34 |
After the initial investment in nutrients and pH supplies, each additional jar costs about £1 (the jar itself and seeds). The nutrients, pH drops, and pH Down support dozens of jars over 6-12 months — the per-plant cost quickly drops to pennies.
The 4-step build process
Step 1Germinate your seeds (day 1)
You need to start your seeds 7-10 days before setting up the jar. This gives the seedling time to develop roots and its first set of true leaves.
Dampen a paper towel, a small piece of rock wool, or a sponge cube. Place 2-3 seeds on the surface. For lettuce, do not cover the seeds — lettuce requires light to trigger germination. For basil, press the seeds gently into the surface but do not bury them deeply.
Place the seeded paper towel on a small saucer or plate. Cover loosely with cling film or place inside an unsealed plastic bag to retain moisture while allowing some air exchange. Put in a warm spot away from direct sunlight — a kitchen counter near the cooker or on top of a router (which generates gentle warmth) works well.
Check daily and mist with a spray bottle if the surface begins to dry out. The paper towel should stay consistently damp but not waterlogged. Soggy conditions promote mould, while dry conditions kill the germinating seed.
Timings: Lettuce typically germinates in 3-5 days. Basil takes 5-10 days. Wait until the seedling has developed its first pair of true leaves (the second set, which look different from the seed leaves) before transplanting. This usually happens 7-14 days after sowing.
Step 2Prepare the mason jar (day 5-7)
While waiting for your seedling to develop, prepare the jar.
Light blocking
Wrap the entire mason jar in aluminium foil. Overlap the edges and press firmly so there are no gaps where light can penetrate. Light reaching the nutrient solution causes algae growth, which is a green film that competes with your plant for nutrients and looks unpleasant. Blocking light completely eliminates this problem at the source. For more on preventing algae, see our algae prevention guide.
If you want a more attractive appearance, you can paint the jar with acrylic paint (any dark colour) instead of using foil. Black, dark blue, and dark green all block light effectively and look much nicer on a windowsill.
Fit check
Verify that your 3-inch net pot sits snugly in the jar opening. The lip of the net pot should rest on the rim of the jar, with the basket portion hanging down inside. If the net pot is slightly too small, you can rest it on a piece of cardboard with a hole cut in it, placed over the jar opening as a makeshift lid.
Nutrient solution
Fill the jar with room-temperature water to approximately 1 centimetre below where the bottom of the net pot sits when placed in the opening. For a 1-litre jar, this is roughly 700-800ml of water.
Add hydroponic nutrients at half the strength recommended on the product label. For most liquid nutrients, half strength means approximately 2.5 to 5 millilitres per litre. Stir well to dissolve completely. For the complete nutrient mixing process, see our hydroponic nutrients for beginners guide.
pH adjustment
Test the pH using your test drops. Add pH Down one drop at a time, stirring between drops, until the reading falls between 5.5 and 6.5. A target of 5.8-6.0 is ideal for most crops. Remember the golden rule: always add nutrients before testing pH, because nutrients change the water chemistry significantly. See our how to adjust pH guide for alternatives if you don’t have pH Down.
Step 3Transplant the seedling (day 7-10)
Your seedling is ready when it has its first set of true leaves and a small but visible root system emerging from the paper towel or rock wool.
Fill the net pot approximately one-third full with rinsed clay pebbles. Rinse the pebbles under running water before first use to remove dust that can cloud your nutrient solution.
Gently lift the seedling from its germination spot, keeping the paper towel or rock wool attached. Place it in the centre of the net pot on top of the first layer of pebbles. The roots should point downward.
Carefully add more clay pebbles around and over the seedling’s root area, filling the net pot to just below the rim. The stem and leaves should be exposed above the pebbles. The pebbles support the seedling upright without crushing the delicate stem — be gentle during this step.
Place the loaded net pot into the jar opening. The bottom of the net pot should be touching or sitting just above the nutrient solution surface. Some solution should wick up through the clay pebbles, keeping the young roots moist while they grow downward into the reservoir. If the solution does not reach the bottom of the net pot, add a little more until it does.
Step 4Position and let nature work (day 10 onwards)
Place your mason jar hydroponics setup on your sunniest windowsill. In the UK, south-facing windows receive the most direct sunlight (approximately 6-8 hours in summer, 2-4 hours in winter). East and west-facing windows provide less direct light but still work well, especially during the longer days of spring and summer.
If your windows are north-facing or you are growing during winter when daylight hours are short, add a clip-on LED grow light positioned 15-20 centimetres above the plant. A basic full-spectrum grow bulb costs £10-15 and fits any desk lamp or clip light. Set a plug-in timer for 14-16 hours on, 8-10 hours off. See our best grow lights guide for specific recommendations.
And now comes the genuinely hardest part of mason jar hydroponics: leaving it alone. The Kratky method is designed to work without human intervention. Your plant does not need you to fuss over it. It needs light, nutrients, and time. Check it once a week to observe progress, but resist the urge to top up water, add extra nutrients, or move the jar around.
What happens inside the jar over 6 weeks
Understanding what is happening beneath the surface helps you trust the process and avoid the most common beginner mistake (interfering with a system that is working perfectly).
Weeks 1-2Root establishment
The seedling establishes itself. Roots extend downward through the clay pebbles and into the nutrient solution. Growth above the surface is slow — most energy is going into root development. The water level drops slightly as the plant begins drinking.
Weeks 2-3Growth acceleration begins
The root system is now well-established in the nutrient solution. Above the surface, you will notice the growth rate accelerating. New leaves appear every few days. The water level continues to drop steadily.
Weeks 3-4The magic becomes visible
This is when the magic becomes visible. The plant grows noticeably between checks. Leaves expand, stems thicken, and the plant takes on its mature form. Below the surface, an air gap has formed between the water and the net pot. Roots in this air gap absorb oxygen — this is the Kratky method’s key innovation.
Weeks 4-6Harvestable size reached
The plant reaches harvestable size. For lettuce, this means a full rosette of leaves ready for a salad. For basil, dense bushy growth with aromatic leaves. The water level has dropped significantly, and a substantial air gap exists. This is completely normal and intentional.
Harvesting your mason jar hydroponics plants
| Plant | Harvest Method | Expected Regrowth |
|---|---|---|
| Lettuce | Cut outer leaves OR cut whole head 2cm above root line | 2-3 weeks more from outer-leaf method |
| Basil | Pinch stem above leaf node, never remove more than 1/3 at once | Two new branches from each cut point |
| Mint | Cut back aggressively to 5cm above base | Even more vigorous regrowth, continuous for months |
| Coriander | Cut individual leaves or small bunches as needed | Re-sow when plant starts to bolt (2-3 months) |
⚠️ The most common mistake: refilling to the top
🚫 The #1 Killer of Kratky Plants
As the water level drops, beginners see the shrinking reservoir and think something is wrong. They refill the jar to the original level, submerging the oxygen-absorbing air roots that have developed in the gap.
These roots suffocate within hours when submerged. The plant develops root rot — brown, slimy roots that can no longer absorb water or nutrients — and wilts even though the jar is full of solution. The plant dies not from lack of water, but from lack of oxygen caused by too much water.
The rule: The dropping water level is not a problem. It is the system working as designed. Only add water if the level has dropped so far that absolutely no roots are touching the solution. Even then, add only enough pH-adjusted water (no additional nutrients) to barely reach the lowest roots. Never refill to the starting level.
Scaling to a windowsill garden
One jar is a proof of concept. Four to six jars is a garden. Line them along your windowsill, each growing a different plant. The most effective approach is staggered planting: start a new jar every 5-7 days. After 4-5 weeks, you will have jars at every stage from freshly planted to harvest-ready. When you harvest one, start a new jar in its place. This creates a permanent cycle of fresh food.
🪟 Suggested 6-Jar Windowsill Rotation
- Jars 1-2: Lettuce (staggered by 2 weeks for continuous supply)
- Jar 3: Basil (harvest continuously for 2-3 months)
- Jar 4: Mint (practically unkillable, perennial)
- Jar 5: Coriander (re-sow every 2 months)
- Jar 6: Parsley (slow to start, produces for months)
This provides continuous salad greens and cooking herbs for a fraction of supermarket prices. See our kitchen herb garden guide for the detailed build.
Label each jar with the plant name and sowing date using tape or a marker on the foil. After a few weeks with multiple jars running, you will forget which is which and when each was planted. Labels take seconds and prevent confusion.
Reusing jars and materials
After harvesting, remove the old plant and roots from the net pot. Rinse the clay pebbles under running water and let them dry. Rinse the jar. Mix fresh nutrient solution and start a new seedling. The jar, net pot, and clay pebbles last indefinitely. The only consumables are seeds (pennies per plant) and a small amount of nutrients per grow.
Over time, mineral deposits may build up on the clay pebbles as a white crusty residue. This is harmless nutrient salts that crystallised during evaporation. Soak the pebbles in a dilute vinegar solution (1 part vinegar to 10 parts water) for an hour, then rinse thoroughly to dissolve the deposits. This restores them to like-new condition.
Frequently asked questions about mason jar hydroponics
What size mason jar is best for hydroponics?
A 500ml to 1 litre wide-mouth jar is ideal for most plants. 500ml works for lettuce and small herbs. 1 litre works for basil, larger lettuce varieties, and any plant you want to grow for extended periods. Wide-mouth is essential — the opening must accommodate a 3-inch net pot. Standard jam jars are usually too narrow.
Can I grow vegetables other than lettuce and herbs in a mason jar?
Yes, though some crops are easier than others. Leafy greens (spinach, kale, pak choi), herbs (all common cooking herbs), and small plants like strawberries work well. Fruiting crops like tomatoes and peppers are possible but need larger containers — a 1-litre mason jar is too small for a full tomato plant’s root system.
How long does a mason jar hydroponic setup last?
Indefinitely. The jar is glass and lasts forever. Net pots and clay pebbles can be reused hundreds of times. The only consumables are seeds, nutrients, and pH supplies. After your initial £20-25 investment, each subsequent grow cycle costs pennies.
Do I need to change the water during the grow cycle?
No — this is the beauty of the Kratky method. You mix the nutrient solution once at the start and the plant uses it up over 5-6 weeks. Never top up or replace water mid-grow. Only start fresh when beginning a new plant.
What if my mason jar is too narrow for a 3-inch net pot?
Two solutions. First, buy 2-inch net pots instead — they fit most standard jam jars. Second, make a cardboard or plastic disc with a hole cut to fit your net pot, then rest the disc over the jar opening. This also works for unusual jar shapes like coffee jars or passata bottles.
Can I use tap water for mason jar hydroponics?
Yes, in most UK areas. Let tap water sit uncovered for 24 hours before use to dissipate chlorine. In very hard water areas like London (TDS above 300 PPM), you may want to mix 50/50 tap and filtered water for best results. See our tap water for hydroponics guide for UK-specific guidance.
How do I know when to start a new jar?
Start germinating new seeds during week 4-5 of your current grow. This way, when you harvest and reset the jar in week 6, you have a seedling ready to transplant immediately. Continuous cycling creates a permanent supply of fresh plants.
What’s the difference between mason jar hydroponics and “proper” hydroponic systems?
None, chemically. The plant responds to nutrients, pH, and light — it doesn’t know or care what container it’s in. Mason jar hydroponics uses the Kratky method (passive, no pump) while larger systems often use DWC (active, with air pump). Both produce equivalent plants. The jar is just smaller and simpler. See our Kratky vs DWC comparison for more detail.
Related posts you might find useful
- Kratky Method Hydroponics: Grow Food Without Electricity — The complete method explained
- Kratky Jar Setup in Under 10 Minutes — Condensed quickstart
- Best Plants for the Kratky Method — What to grow in your jar
- Kratky Method Troubleshooting — Fix problems when they arise
- DIY Hydroponics with Plastic Bottles — Even cheaper than mason jars
- 5 Pound Shop Hydroponic Systems — Budget components
- Hydroponic Lettuce: Week-by-Week Guide — Perfect first crop for your jar
Build Your First System on a Budget
Our 22-page ebook Build Your First Hydroponic System on a Budget covers mason jars, plastic bottles, pound shop builds, and scale-ups — with complete UK shopping lists and cost-saving strategies.
✓ Step-by-step DIY builds · ✓ UK shopping lists · ✓ Cost-saving strategies · ✓ Instant PDF download